Viewing Your Custom Photoshop Color Settings
Opening The Color Settings Dialog Box
Let’s quickly recap the color settings we changed in the previous tutorial. To access Photoshop’s color settings, go up to the Edit menu at the the top of the screen and choose Color Settings: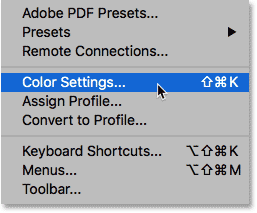
Going to Edit > Color Settings.
Choosing Your Custom Preset
The Color Settings dialog box will open. If you followed along with the previous tutorial, your Settings option at the top should already be set to your custom preset. In my case, I named my preset “My Color Settings”:
Your custom color settings preset should already be selected.
If, for some reason, your custom preset is not already selected, click on the name of the current preset. Then choose your custom preset from the list:
Selecting “My Color Settings” from the list of presets.
The RGB Working Space
With the custom preset active, we see that our RGB working space has been changed from sRGB to Adobe RGB:
Our custom preset uses Adobe RGB as the RGB working space.
The Color Management Policies
And in the Color Management Policies section, we’ve made sure that the RGB option (along with CMYK and Gray) is set to Preserve Embedded Profiles. Also, the Profile Mismatches and Missing Profiles checkboxes are all unchecked. We learned about these options in the previous tutorial:
The Color Management Policies options.
Notice that the Color Settings dialog box is telling us that, at the moment, our custom settings only apply to Photoshop. They have not yet been synchronized with our other Creative Cloud or Creative Suite apps:
The custom setting has not yet been synchronized with the other apps.
Closing The Color Settings Dialog Box
To close Photoshop’s Color Settings dialog box, click OK:
Clicking OK to close the Color Settings dialog box.
How To Sync Your Color Settings
Step 1: Open Adobe Bridge
Let’s synch our custom Photoshop color settings with the rest of the Creative Cloud or Creative Suite. To do that, we’ll need Adobe Bridge. To open Adobe Bridge from within Photoshop, go up to the File menu at the top of the screen and choose Browse in Bridge:
In Photoshop, go to File > Browse in Bridge.
Step 2: Open The Color Settings Dialog Box
Then in Bridge CC, go up to the Edit menu and choose Color Settings. In Bridge CS6, go up to the Edit menu and choose Creative Suite Color Settings. This opens the Color Settings dialog box:
In Bridge, go to Edit > Color Settings (CC) or Creative Suite Color Settings (CS6).
Step 3: Choose Your Custom Color Settings Preset
Notice that the Color Settings dialog box in Bridge looks different from the one we saw back in Photoshop. Rather than choosing individual color settings, here we choose a color settings preset. The preset will then be synchronized across every app in the Creative Cloud or Creative Suite. By default, the North America General Purpose 2 preset is selected. This is the same preset Photoshop was using before we changed it. At the top of the dialog box, we see another message telling us that our color settings are not yet synchronized:
The Color Settings dialog box in Adobe Bridge.
Choose your custom preset (the one you created in Photoshop) from the list. I’ll choose the “My Color Settings” preset. Notice that the description we added for the preset back in Photoshop appears below the preset’s name:
Selecting my custom “My Color Settings” preset.
Step 4: Click “Apply”
To sync your preset across every app in the Creative Cloud or Creative Suite, click Apply at the bottom of the dialog box:
Clicking “Apply” to sync the color settings.
Bridge closes the Color Settings dialog box after you click the “Apply” button. To see what has actually happened, let’s quickly re-open it. Go up to the Edit menu and choose Color Settings (CC) or Creative Suite Color Settings (CS6). This time, the Color Settings dialog box opens with our custom preset already selected. And, the message at the top of the dialog box now tells us that we’ve successfully synced the preset will every app in the Creative Cloud / Creative Suite:
Every app in the Creative Cloud / Creative Suite is now using your custom color settings.


